Deploy a Hugo website to Github pages and build with Travis CI
GitHub provides free and fast static hosting over SSL for personal, organization, or project pages directly from a GitHub repository via its GitHub Pages service.
I know there are other options, such as Netlify, but I was not too keen to yet depend on another framework, specially one using node.js… famous last words…
This is part of my Challenge to make 26 years before 2017 ends.
What didn’t work… or at least I gave up in 5 minutes
From the Hugo’s tutorial:
git checkout --orphan gh-pages
git reset --hard
git commit --allow-empty -m "Initializing gh-pages branch"
git push origin gh-pages
git checkout master
rm -rf public
git worktree add -B gh-pages public origin/gh-pages
Create the following commit-gh-pages-files.sh:
hugo -D
cd public && git add --all && git commit -m "Publishing to gh-pages" && cd ..
And run with exec mode:
chmod +x commit-gh-pages-files.sh
./commit-gh-pages-files.sh
Push your changes:
git push origin gh-pages
The next step is to point Github from where do we want to publish our page, by default it should use the same gh-pages branch we just created, but double-checking does no harm. On the repository page go to the Option tab (not the same as the profile one), and scroll down until you reach to the Github pages.
The page was published at https://alignan.github.io/argos-library/.
I followed all steps above but the result was not as expected:

Hardly the result I was expecting!
The pase was not rendering functional (i.e. the links were broken and pointing to a default 404 page)… what!? I even changed the baseURL = "/" as pointed in some documentation. The theme was not rendering properly…
Next thing I tried…
From haruair site I took the following instructions, which is great because I wanted to have a Travis integration as well.
First step is clean up the mess from the section above:
rm -rf public
git worktree prune
git branch -D gh-pages
git push origin :gh-pages
However the setup instructions didn’t convince me… I also checked instructions at Jente’s blog, but I wanted to keep my master branch for sources, and I felt I was going the wrong direction…
The one I finally implemented
Then I stumbled upon this snippet and the explanation about why using gh-pages is not recommended made sort of sense: from a practical perspective, I’m creating a personal page (user page), whereas I might create pages for my specific projects (gh-pages) - this semantic differentiation was logical.
The next step is to create a new repository to host the rendered site from Hugo and add as submodule, I created mine as alignan.github.io as expected by the User pages (see the link for more information).
Pro-tip: remember to change the draft: false in your posts!, else it will not be rendered by Hugo (unless you are enabling the option to render drafts).
rm -rf public
git submodule add -f https://github.com/alignan/alignan.github.io.git public
Now render the page, and publish to the alignan.github.io repository.
hugo
cd public & git add .
git commit -m "Rendered website"
git push -f origin master
Now back to the main source code repo (in the step above remember we are in the /public folder):
cd ..
git add .
git commit -m "Added a repository to render the site"
git push -u origin master
If everything was done correctly, you should see both submodules:
$ cat .gitmodules
[submodule "themes/ghostwriter"]
	path = themes/ghostwriter
	url = https://github.com/jbub/ghostwriter
[submodule "public"]
	path = public
	url = git@github.com:alignan/alignan.github.io.git
And the site now renders as below:

Keeping the blog updated
Well, sort of… more like “how can I publish with just one bash script away”…
touch build-and-deploy.sh
chmod +x build-and-deploy.sh
I put this together just to test (doesn’t check for errors):
#!/bin/bash

echo -e "\033[0;32mDeploying updates to Github...\033[0m"

# Build the project
hugo

# Add changes to git
cd public
git add -A

# Commit changes
msg="rebuilding site `date`"
if [ $# -eq 1 ]
  then msg="$1"
fi
git commit -m "$msg"

# Push source and build repos
git push origin master
cd ..
Each time I run the build-and-deploy.sh script, it will render the site, commit changes using the timestamp and push to my site repository (not the source code one). This is a basic automation, but far from continuously building. Other options (again, like Netlify) are highly appealing, specially if I want to scale beyond the 1GB of hosting and the building restrictions Github has… but the objective of this was just learn something new, and to avoid putting more excuses and optimizations in the queue.
As above, one of my second objectives for my Challenge was to automate “something” using either Travis or Jenkins… why not this blog?
Continuous Integration with Travis CI
Sign to Travis using your Github account. When you create your Travis account, you grant Travis access to your GitHub account, which means Travis can access your GitHub repositories.
The next step is to teach Travis how to build Hugo. There are two ways to compile the site, one is to pull the dependencies, install and compile (which would take more time), or to include a pre-compiled Hugo binary from the release page.
The one used for the next step is the V0.29.
The flow should be as below:
- I push to
masterat https://github.com/alignan/argos-library - Travis install the pre-requisites to run Hugo’s binary and compiles the site in
/public - Travis creates a new build commit and pushes to
masterat https://github.com/alignan/alignan.github.io
As an user, I want to use my github name and email in the automated process.
I got plenty of inspiration from Roman Coedo’s blog, but I also got some tips from Chris Hager’s blog, Zendesk and Martin Kaptein - credits to them all.
To avoid putting information about my key in my repo (even if encrypted), I followed the next advice:
Travis CI also needs write-access to the GitHub repository, to be able to update the gh-pages branch. For this we provide a GitHub token environment variable named GITHUB_TOKEN in this example. Environment variables can be specified on the Travis CI website in the repository settings (see the Travis environment variables docs). You can generate this token in your GitHub account settings under “Personal access tokens -> Generate new token” (ensure that the “repo” checkbox is enabled).
Once I got my token, next step is to activate the repository in Travis: just navigate through your repository list and click activate. In the repository settings I enabled the following options:
- Build only is a
.ymlfile is present - Build branch updates
- Build Pull Request updates
And in the Environmental variables field, I created a GITHUB_TOKEN variable, with the value of the token I got from my Github account. One important thing: do not forget to disable the option to Display the value in the build log!.

The next step is to set the .travis.yml properly, which will be used by Travis to automate the tasks. More information about this can be found in Travis CI’s Github page deployment help. This is the my .travis.yml file:
# Environment
os:
    - linux

# Install the apt prerequisites
addons:
  apt:
    packages:
      - python-pygments

# Compile the site
script:
    - binaries/hugo --theme=ghostwriter

# Deploy the site - this hook comes from Travis integration
deploy:
    # The output of our static site
    local_dir: public
    # The repository we are deploying to
    repo: alignan/alignan.github.io
    # The branch we are pushing the static repository
    target_branch: master
    # Information to use in the commit
    email: antonio.lignan@gmail.com
    name: "Antonio Lignan"
    provider: pages
    # Recommended setting
    skip_cleanup: true
    # Set in Travis CI dashboard
    github_token: $GITHUB_TOKEN
    on:
      branch: master
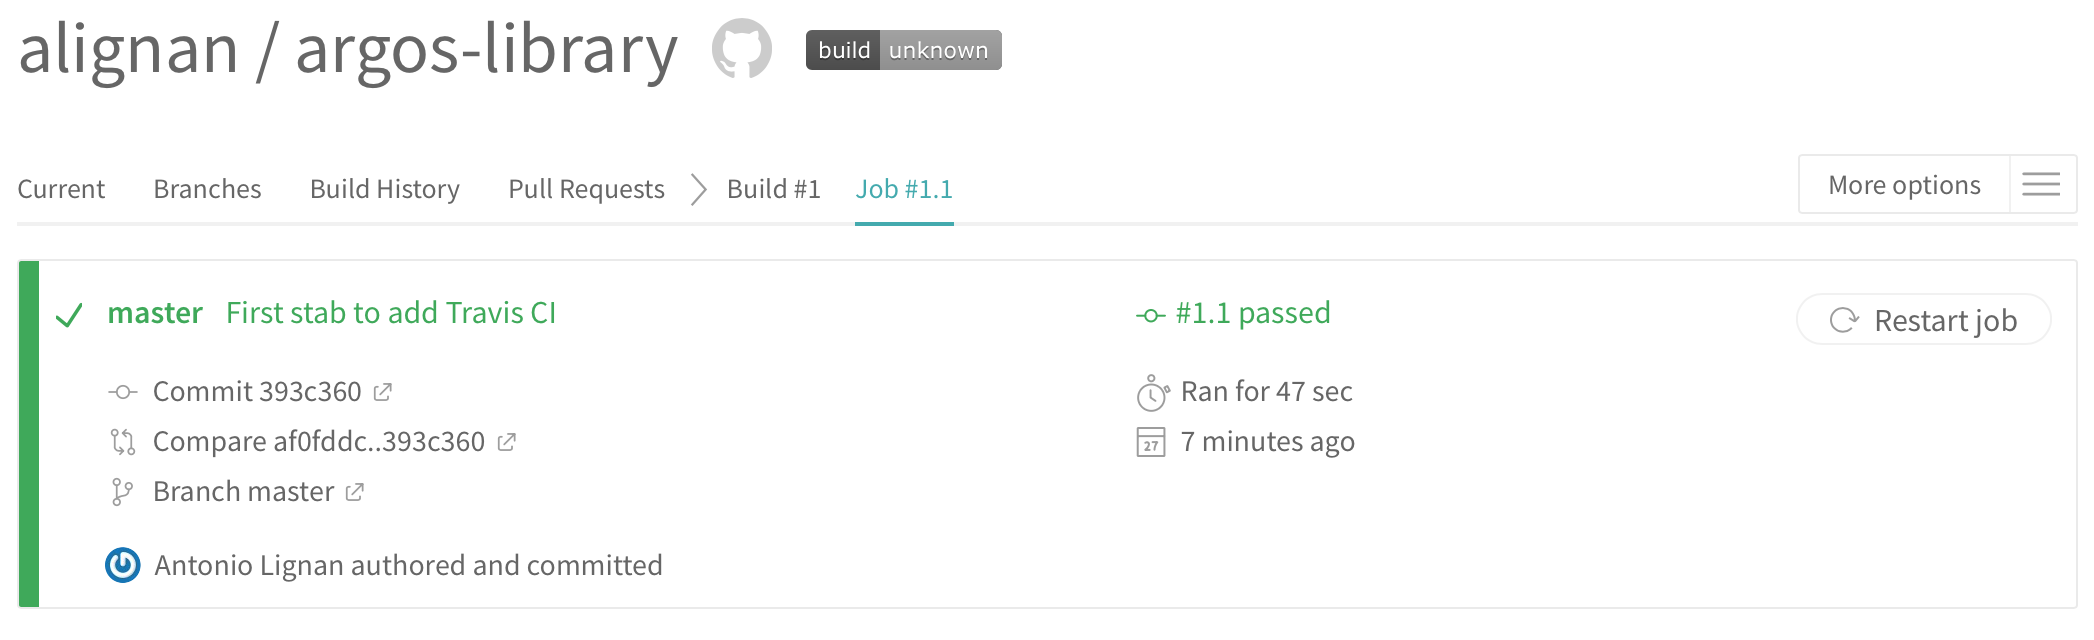
As shown below, it takes less than a minute to run Travis CI routine, and now just by pushing to master the site is rendered automatically.
The commit history in the https://github.com/alignan/alignan.github.io is squashed, but I don’t mind losing the history (at the moment, famous last words yet again…).
Final tweaking
The final touch is to set a Travis CI build badge to the repository.
As the instructions in the previous link, I just clicked on the badge and copied the link in Markdown format, then pasted it in the README.md file.